• Система автоматизации с открытым исходным кодом на базе esp8266/esp32 микроконтроллеров и приложения IoT Manager. Наша группа в Telegram

Питание ESP8266-01 от батареи

alexlaw

Member
Здравствуйте.
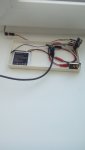
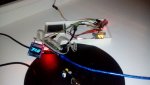
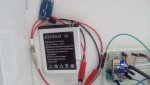
Сегодня сделал термометр на
esp8266-01 и термодатчика DS18B20.
Валялся старый аккумулятор от телефона - приспособил для питания.
Собственно вопрос.
У кого есть какой то опыт для питания ESP от батареи - поделитесь опытом.
Я думаю долго батарея не протянет.
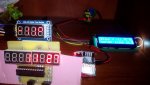
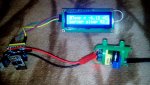
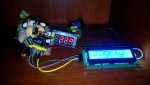

КЛИЕНТ
Код:
#include <ESP8266WiFi.h>
#include <Wire.h>
#include <LiquidCrystal_I2C.h>
LiquidCrystal_I2C lcd(0x3F, 16, 2);
String line;
const char* ssid     = " ";
const char* password = " ";
const char* host = "192.168.4.1";
byte tries = 16;

void setup() {
  line="";
lcd.begin(1,3);  // sda, scl
lcd.backlight();
   lcd.clear();
   lcd.clear();
   lcd.print ("1-TX-SDA");
   lcd.setCursor(0, 1);
   lcd.print ("3-RX-SCL");
   delay(1000);
   lcd.clear();
   lcd.clear();
   lcd.print ("Connecting to ");
   lcd.setCursor(0, 1);
   lcd.print (ssid);
delay(1000);
   lcd.setCursor(0, 1);
   lcd.print ("                      ");
  WiFi.begin(ssid, password);
  String s="";
    while (--tries && WiFi.status() != WL_CONNECTED)
  {
    s=s+".";
    lcd.print (s);
    delay(1000);
  }
    if (WiFi.status() != WL_CONNECTED)
  {
   lcd.clear();
   lcd.clear();
   lcd.print ("ESP restart");
   delay(2000);
   ESP.restart();
  }
  else {
   lcd.clear();
   lcd.clear();
   lcd.print ("WiFi connected");
   lcd.setCursor(0, 1);
   lcd.print ("IP: ");
   lcd.print (WiFi.localIP());
   delay(1000);
  }

}

int value = 0;

void loop() {
  delay(5000);
   lcd.clear();
   lcd.clear();
   lcd.print ("connecting to ");
   lcd.setCursor(0, 1);
   lcd.print (host);

  WiFiClient client;
  const int httpPort = 80;
  if (!client.connect(host , httpPort)) {
    lcd.clear();
   lcd.clear();
   lcd.print ("connect failed");
    value = 0;
    return;
  }
  if (value==5) {
   value = 0;
  String url = "/";
  url += "sleep";
  client.print(String("GET ") + url + " HTTP/1.1\r\n" +
               "Host: " + host + "\r\n" +
               "Connection: close\r\n\r\n");
      client.stop();
    lcd.clear();
   lcd.clear();
   lcd.print (line);
   lcd.setCursor(0, 1);
   lcd.print ("server sleep ");   
    //  delay(60000);//1 min
    delay(1000);
    unsigned long time1 = millis();
    unsigned long time2 = millis() - time1;      
    while (time2 < 301000){    
    //lcd.print ("                ");
   lcd.setCursor(13, 1);
   lcd.print ("   ");
   lcd.setCursor(13, 1);
   lcd.print (301-time2/1000);
   time2 = millis() - time1;
   delay(1000);  
    }
     // return;
    ESP.restart();      
    }
  String url = "/";
  url += "";
  // This will send the request to the server
  client.print(String("GET ") + url + " HTTP/1.1\r\n" +
               "Host: " + host + "\r\n" +
               "Connection: close\r\n\r\n");
  unsigned long timeout = millis();
  while (client.available() == 0) {
    if (millis() - timeout > 5000) {
   lcd.clear();
   lcd.clear();
   lcd.print ("Client Timeout !");
      client.stop();
      return;
    }
  }
 
  // Read all the lines of the reply from server and print them to Serial
  while(client.available()){
    line = client.readStringUntil('\r');
    lcd.clear();
    lcd.clear();
    lcd.print (line);
  }
   lcd.setCursor(0, 1);
   lcd.print ("close connect");
    value++;
}[/SPOILER]
СЕРВЕР
Код:
void WIFIinit() {
// Отключаем WIFI
WiFi.disconnect();
// Меняем режим на режим точки доступа
WiFi.mode(WIFI_AP);
// Задаем настройки сети
WiFi.softAPConfig(apIP, apIP, IPAddress(255, 255, 255, 0));
// Включаем WIFI в режиме точки доступа с именем и паролем
// хронящихся в переменных _ssidAP _passwordAP
WiFi.softAP(_ssidAP.c_str(), _passwordAP.c_str());
//return true;
}
Код:
void HTTP_init(void) {
  HTTP.onNotFound(handleNotFound); // Сообщение если нет страницы.
  HTTP.on("/", handleRoot); // Главная страница
  HTTP.on("/restart", handle_Restart); // Перезагрузка модуля по запросу
  HTTP.on("/sleep", handle_Sleep);
  // Запускаем HTTP сервер
  HTTP.begin();

}

// Ответ если страница не найдена
void handleNotFound(){
  String message = "File Not Found\n\n";
  message += "URI: ";
  message += HTTP.uri();
  message += "\nMethod: ";
  message += (HTTP.method() == HTTP_GET)?"GET":"POST";
  message += "\nArguments: ";
  message += HTTP.args();
  message += "\n";
  for (uint8_t i=0; i<HTTP.args(); i++){
    message += " " + HTTP.argName(i) + ": " + HTTP.arg(i) + "\n";
  }
  HTTP.send(404, "text/plain", message);
}

// Ответ при обращении к основной странице
void handleRoot() {
       DS18B20.requestTemperatures();                   // Запрос на считывание температуры
  String message = "Temp = ";
  message += DS18B20.getTempCByIndex(0);
  message += " *C";  
  HTTP.send(200, "text/plain", message);
}

// Перезагрузка модуля по запросу вида http://192.168.1.121/restart?device=ok
void handle_Restart() {
  String restart = HTTP.arg("device");
  if (restart == "ok") ESP.restart();
  HTTP.send(200, "text/plain", "OK");
}

void handle_Sleep() {
  digitalWrite( setpin, 0 );
  //1,000,000=1 second
ESP.deepSleep(300e6); //5 min 
}

Код:
#include <ESP8266WiFi.h>
#include <ESP8266WebServer.h>
#include <OneWire.h>  
#include <DallasTemperature.h>
int setpin=0;
IPAddress apIP(192, 168, 4, 1);

// Web интерфейс для устройства
ESP8266WebServer HTTP(80);

// Определяем переменные wifi
String _ssid     = ""; // Для хранения SSID
String _password = " "; // Для хранения пароля сети
String _ssidAP = " ";   // SSID AP точки доступа
String _passwordAP = " "; // пароль точки доступа
#define ONE_WIRE_BUS 2                                  // Указываем, к какому выводу подключена датчик
OneWire oneWire(ONE_WIRE_BUS);
DallasTemperature DS18B20(&oneWire);
void setup() {
  pinMode(setpin, OUTPUT);
  Serial.begin(115200);
  delay(10);                                            // Пауза 10 мкс
  DS18B20.begin();                                      // Инициализация DS18B20

  Serial.println("");
  Serial.println("Start 1-WIFI");
  //Запускаем WIFI
  WIFIinit();
  //Настраиваем и запускаем HTTP интерфейс
  Serial.println("Start 2-WebServer");
  HTTP_init();
}

void loop() {
  HTTP.handleClient();
  delay(1);
}
 

Вложения

Последнее редактирование:

pvvx

Активный участник сообщества
Поставьте E-Ink дисплей.
Выбор их большой. Жрут мкА
Есть и в местных магазинах 7.5-дюймовый трехцветный e-Ink HAT дисплей с разрешением 640 х 384 и углом обзора >170°

Вы изобретаете Apple Watch?
Купите готовый - там уже встроены: Барометрический высотомер, Гироскоп, Датчик ускорения (G-sensor), GPS, Wi-Fi IEEE 802.11 b/g/n, Bluetooth 4.2, Измерение пульса, Вибра, ...
 
Последнее редактирование:

alexlaw

Member
Немного причесал код для "Client".
Код:
#include <ESP8266WiFi.h>
#include <Wire.h>
#include <LiquidCrystal_I2C.h>
LiquidCrystal_I2C lcd(0x3F, 16, 2);
String line;
const char* ssid     = " ";
const char* password = " ";
const char* host = "192.168.4.1";
byte tries = 16;
void setup() {
  line="";
lcd.begin(1,3);  // sda, scl
lcd.backlight();
   lcd.clear();
   lcd.clear();
   lcd.print ("1-TX-SDA");
   lcd.setCursor(0, 1);
   lcd.print ("3-RX-SCL");
   delay(1000);
WiFi.mode(WIFI_STA);
  // We start by connecting to a WiFi network
   lcd.clear();
   lcd.clear();
   lcd.print ("Connecting to ");
   lcd.setCursor(0, 1);
   lcd.print (ssid);
delay(1000);
  WiFi.begin(ssid, password);
   lcd.clear();
   lcd.clear();
   String s=".";
    while (--tries && WiFi.status() != WL_CONNECTED)
  {   
    lcd.print (s);
    delay(1000);
  }
    if (WiFi.status() != WL_CONNECTED)
  {
   lcd.clear();
   lcd.clear();
   lcd.print ("ESP restart");
   delay(2000);
   ESP.restart();
  }
  else {
   lcd.clear();
   lcd.clear();
   lcd.print ("WiFi connected");
   lcd.setCursor(0, 1);
   lcd.print ("IP: ");
   lcd.print (WiFi.localIP());
   delay(1000);
  }
}

int value = 0;

void loop() {
   delay(5000);
   lcd.clear();
   lcd.clear();
   lcd.print ("connect to ");
   lcd.setCursor(0, 1);
   lcd.print (host);
  // Use WiFiClient class to create TCP connections
  WiFiClient client;
  const int httpPort = 80;
  if (!client.connect(host , httpPort)) {
   lcd.clear();
   lcd.clear();
   lcd.print ("connect failed");
    value = 0;
    return;
  }
  if (value==5) {
   value = 0;
  String url = "/";
  url += "sleep"; 
  client.print(String("GET ") + url + " HTTP/1.1\r\n" +
               "Host: " + host + "\r\n" +
               "Connection: close\r\n\r\n"); 
      client.stop();
   lcd.clear();
   lcd.clear();
   lcd.print (line);
   lcd.setCursor(0, 1);
   lcd.print ("server sleep ");    
    //  delay(60000);//1 min
    delay(1000);
    unsigned long time1 = millis();
    unsigned long time2 = millis() - time1;       
    while (time2 < 301000){
   lcd.setCursor(13, 1);
   lcd.print ("   ");
   lcd.setCursor(13, 1);
   lcd.print (301-time2/1000);
   time2 = millis() - time1;
   delay(1000);   
    }
     // return; 
    ESP.restart();       
    }
  // We now create a URI for the request
  String url = "/";
  url += ""; 
// This will send the request to the server
  client.print(String("GET ") + url + " HTTP/1.1\r\n" +
               "Host: " + host + "\r\n" +
               "Connection: close\r\n\r\n");
  unsigned long timeout = millis();
  while (client.available() == 0) {
    if (millis() - timeout > 5000) {
   lcd.clear();
   lcd.clear();
   lcd.print ("Client Timeout !");
      client.stop();
      return;
    }
  }
 
  // Read all the lines of the reply from server and print them to Serial
  while(client.available()){
    line = client.readStringUntil('\r');   
    lcd.clear();
    lcd.clear();
    lcd.print (line);
  }
   lcd.setCursor(0, 1);
   lcd.print ("close connect");
    value++;
  if (line.indexOf("Temp") != -1)  value=5;
}
Увеличелось время сна сервера.
Скоро 2-е суток, как работает от батареи - батарея держиться молодцом.
Температура на улице в среднем -6, max -10 C.
Когда батарея совсем сдуется отпишусь.
 

alexlaw

Member
К сожалению от батареи проработало всего 3 суток.
Ради эсперимента добавил еще один дисплей - на семисегментных индикатарах.
Дпя этого добавил еще 4 пина.https://esp8266.ru/esp8266-esp-01-hacked/

Код:
#include <ESP8266WiFi.h>
#include <Wire.h>
#include <LiquidCrystal_I2C.h>
#include <Ticker.h>
LiquidCrystal_I2C lcd(0x3F, 16, 2);
String line;
const char* ssid     = "LAW_ESP8266";
const char* password = "30272609";
const char* host = "192.168.4.1";
byte tries = 16;
Ticker flipper;
boolean Anod = true;
boolean TempNegativ = false;

const int KeySelect= 13;//защелка-12 595 RCLK
const int Data = 12;//14 595 dio
const int Takt = 15;//11 595  SCLK
float temperature;  // измеренная температура
int NumberDispA[5] = {B00000000,B00000001,B00000010,B00000100,B00001000};
int NumberValueA[11] = {
192, 249, 164, 176, 153, 146, 130, 248, 128, 152, 255
};
int ValueSegment[10] = {
254, 253, 251, 247, 239, 223, 191, 127, 0,  255
};
int x;
void setup() {
pinMode(KeySelect, OUTPUT);
pinMode(Data, OUTPUT);
pinMode(Takt, OUTPUT);
  line="";
  temperature=10000;
lcd.begin(1,3);  // sda, scl
lcd.backlight();
   lcd.clear();
   lcd.clear();
   lcd.print ("1-TX-SDA");
   lcd.setCursor(0, 1);
   lcd.print ("3-RX-SCL");
   delay(1000);
WiFi.mode(WIFI_STA);
  // We start by connecting to a WiFi network
   lcd.clear();
   lcd.clear();
   lcd.print ("Connecting to ");
   lcd.setCursor(0, 1);
   lcd.print (ssid);
delay(1000);
  WiFi.begin(ssid, password);
   lcd.clear();
   lcd.clear();
   String s=".";
    while (--tries && WiFi.status() != WL_CONNECTED)
  {
    lcd.print (s);
    delay(1000);
  }
    if (WiFi.status() != WL_CONNECTED)
  {
   lcd.clear();
   lcd.clear();
   lcd.print ("ESP restart");
   delay(2000);
   ESP.restart();
  }
  else {
   lcd.clear();
   lcd.clear();
   lcd.print ("WiFi connected");
   lcd.setCursor(0, 1);
   lcd.print ("IP: ");
   lcd.print (WiFi.localIP());
   delay(1000);
  }
x=0;
}
int value = 0;
void loop() {
   delay(5000);
   lcd.clear();
   lcd.clear();
   lcd.print ("connect to ");
   lcd.setCursor(0, 1);
   lcd.print (host);
  // Use WiFiClient class to create TCP connections
  WiFiClient client;
  const int httpPort = 80;
  if (!client.connect(host , httpPort)) {
   lcd.clear();
   lcd.clear();
   lcd.print ("connect failed");
    value = 0;
    return;
  }
  if (value==5) {
   value = 0;
  String url = "/";
  url += "sleep";
  client.print(String("GET ") + url + " HTTP/1.1\r\n" +
               "Host: " + host + "\r\n" +
               "Connection: close\r\n\r\n");
      client.stop();
   lcd.clear();
   lcd.clear();
   lcd.print (line);
   lcd.setCursor(0, 1);
   lcd.print ("server sleep ");
    //  delay(60000);//1 min
    delay(1000);
    unsigned long time1 = millis();
    unsigned long time2 = millis() - time1;
    while (time2 < 301000){
   lcd.setCursor(13, 1);
   lcd.print ("   ");
   lcd.setCursor(13, 1);
   lcd.print (301-time2/1000);
   time2 = millis() - time1;
   delay(1000);
    }
     return;
    //ESP.restart();
    }
  // We now create a URI for the request
  String url = "/";
  url += "";
// This will send the request to the server
  client.print(String("GET ") + url + " HTTP/1.1\r\n" +
               "Host: " + host + "\r\n" +
               "Connection: close\r\n\r\n");
  unsigned long timeout = millis();
  while (client.available() == 0) {
    if (millis() - timeout > 5000) {
   lcd.clear();
   lcd.clear();
   lcd.print ("Client Timeout !");
      client.stop();
      return;
    }
  }
  // Read all the lines of the reply from server and print them to Serial
  while(client.available()){
    line = client.readStringUntil('\r');
    lcd.clear();
    lcd.clear();
    lcd.print (line);
  }
   lcd.setCursor(0, 1);
   lcd.print ("close connect");
    value++;
  if (line.indexOf("Temp") != -1) { value=5;
    int a1 = line.indexOf("Temp = ");
    int a2 = line.indexOf("*C");
    String str = line.substring(a1+7,a2);
    char newStr[10];
    str.toCharArray(newStr,str.length());
    temperature=atof(newStr);
   // вывод измеренной температуры на индикаторы
if (temperature >= 0) {
   // температура положительная
  // x=(int)(10*temperature); 
    x=(int)(temperature);
    TempNegativ = false;
}
else {
   // температура отрицательная
   // отображается минус
   x=(int)(-1*temperature);
   TempNegativ = true;
}
  // flip the pin every 0.3s
flipper.attach_ms(1, refresh);
  }
}
void refresh(){
int number=x;
int dot=0;
//dot=128;K- | 128; A- & 127
if (Anod) {
dot=127;
if (number>9999 | number<0){
sendCommand(NumberDispA[4], 134);
sendCommand(NumberDispA[3], 175);
sendCommand(NumberDispA[2], 175);
sendCommand(NumberDispA[1], 127);
return;
}
for (int i=2;i < 5; i++)
{
byte character= number % 10;
if (number == 0 && i > 2) character = 10;
sendCommand(NumberDispA[i], NumberValueA[character]);
number= number/10;
}
sendCommand(NumberDispA[1], 156);
if (TempNegativ) {
sendCommand(NumberDispA[4], 191);
}
sendCommand(B00010000, NumberValueA[10]);
}

}
void sendCommand(int segment, int value)
{
digitalWrite(KeySelect, LOW); //chip select is active low
shiftOut(Data,Takt,MSBFIRST,value);
shiftOut(Data,Takt,MSBFIRST,segment);
digitalWrite(KeySelect,HIGH);
//delay(1);
}
 

Вложения

Последнее редактирование:

alexlaw

Member
для эксперимента добавьте кнопку от EN на Vcc и поставьте резистор от 10 до 100 к от EN на GND.
При нажатии на кнопку EN подключается к Vcc
При отпускании кнопки на EN должен быть ноль.
и добавьте еще deep-sleep, который включается скажем через 5 секунд после старта.
-------------------------
Логика следующая
Если надо посмотреть температуру, то нажимаете кнопку и смотрите
Температура будет отображаться пока держите кнопку, но не более 5 секунд.
Если хотите снова смотреть то снова нажимаете.
.
К сожелению датчик вместе с ESP находится на улице и нажать кнопку не получиться :)
 

alexlaw

Member
А индикатор тоже на улице?
Датчик и 1-й ESP находятся на улице на балконе в коробке. Это сервер.
Индикаторы и 2-й ESP дома. Это клиент.
В первом посте 2 фото - два разных ESP.
Когда сервер (первый ESP) запущен, второй ESP к нему (к первому ESP) подключается делает запрос температуры и дает команду серверу спать.
На LCD 2-строка оставшееся время до пробуждения сервера (5 мин). После этого 2-ESP-клиент считает, что сервер проснулся и пытается к нему подключиться и все повторяется.
а устройство дома поставьте и питайте от сети, вообще батарейки не надо.
Не охота сверлить дырки в пластиковых окнах.

Хотел сделать так Беспроводная зарядка своими руками: делаем безопасную,
чтобы через оконные стекла передавать питание. Но не получилось;)
 
Последнее редактирование:

=AK=

New member
Когда сервер (первый ESP) запущен, второй ESP к нему (к первому ESP) подключается делает запрос температуры и дает команду серверу спать.
А не лучше ли сделать наоборот, сервером тот ESP который дома и у которого, надо полагать, вдоволь питания. Тогда тот ESP, который на балконе и запитан от батарейки, раз в сколько-то минут просыпается, подключается к серверу, отсылает по UDP температуру и сразу же снова засыпает, безо всяких запросов и команд.
 

alexlaw

Member
А не лучше ли сделать наоборот, сервером тот ESP который дома и у которого, надо полагать, вдоволь питания. Тогда тот ESP, который на балконе и запитан от батарейки, раз в сколько-то минут просыпается, подключается к серверу, отсылает по UDP температуру и сразу же снова засыпает, безо всяких запросов и команд.
Ну допустим продержится батарея не 3 суток, а четверо - принципиальной разницы я не вижу.
И второе, когда сервер на батареи, то можно определить, жив он или уже нет.
А наоборот, то клиент может быть уже замолчал навсегда, а мы об этом не узнаем.
 
Последнее редактирование:

=AK=

New member
Ну допустим продержится батарея не 3 суток, а четверо - принципиальной разницы я не вижу.
Это можно посчитать. Пока ESP спит, ток потребления у него примерно 20 мкА. Это скорей всего меньше чем ток саморазряда вашей батареи.

Когда ESP просыпается, то подключение к серверу у него занимает примерно 3-5 сек если номер WiFi канала неизвестен, или примерно 1-2 сек если номер канала известен заранее. Передача самого UDP пакета на этом фоне занимает так мало времени, что можно его не учитывать. Если принять, что ESP потребляет, скажем, 250 мА в течении 2 сек (это явный перебор, но будем консервативны), то передача одного измерения возьмет 0.5 А*сек. При емкости батареи, скажем, 2 А*ч он сможет передать измерение примерно 14 тыс раз. При интервале измерения полчаса батарея будет разряжаться почти год.

И второе, когда сервер на батареи, то можно определить, жив он или уже нет.
А наоборот, то клиент может быть уже замолчал навсегда, а мы об этом не узнаем.
Если он должен рапортовать каждые полчаса, а в течении, скажем, 2 часов от него ни слуху ни духу - то сервер имеет полноя право поднимать тревогу: "сенсор пропал, не выходит на связь".

Ну и в вместе с измеренной температурой никто не мешает передавать измеренное напряжение бпатареи, чтобы сервер мог отобразить на экране, скольо в ней осталось заряда.
 

alexlaw

Member
А не лучше ли сделать наоборот
Попробовал.
Сервер
Код:
#include <ESP8266WiFi.h>
#include <WiFiUdp.h>
#include <Wire.h>
#include <LiquidCrystal_I2C.h>
LiquidCrystal_I2C lcd(0x3F, 16, 2);
String _ssidAP = "UDP_ESP8266";   // SSID AP точки доступа
String _passwordAP = "123456789"; // пароль точки доступа
IPAddress apIP(192, 168, 4, 1);
WiFiUDP UDPTestServer;
unsigned int UDPPort = 2807;
const int packetSize = 16;
byte packetBuffer[packetSize];
String myData = "";
unsigned long sec;
unsigned long time1;
unsigned long time2;
void setup() {
lcd.begin(1,3);  // sda, scl
lcd.backlight();
   lcd.clear();
   lcd.clear();
   lcd.print ("1-TX-SDA");
   lcd.setCursor(0, 1);
   lcd.print ("3-RX-SCL");
   delay(1000);
// Отключаем WIFI
  WiFi.disconnect();
  // Меняем режим на режим точки доступа
  WiFi.mode(WIFI_AP);
  // Задаем настройки сети
  WiFi.softAPConfig(IPAddress(192, 168, 4, 60), apIP, IPAddress(255, 255, 255, 0));
  // Включаем WIFI в режиме точки доступа с именем и паролем
  // хронящихся в переменных _ssidAP _passwordAP
  WiFi.softAP(_ssidAP.c_str(), _passwordAP.c_str());
  UDPTestServer.begin(UDPPort);
   lcd.clear();
   lcd.clear();
   lcd.print ("IP: ");
   lcd.print ("192.168.4.60");
   lcd.setCursor(0, 1);
   lcd.print ("UDPPort: ");
   lcd.print ("2807");
delay(3000);
   lcd.clear();
   lcd.clear();
   lcd.print ("listening       ");
   time1 = millis();
}

void loop() {
handleUDPServer();
time2 = millis() - time1;
sec = time2 / 1000;
lcd.setCursor(0, 1);
lcd.print (sec);
delay(1);
}

void handleUDPServer() {
int cb = UDPTestServer.parsePacket();
    for(int i = 0; i < packetSize; i++) {
            packetBuffer[i]=0x20;
    }
    myData="";
  if (cb) {
    UDPTestServer.read(packetBuffer, packetSize);
    for(int i = 0; i < packetSize; i++) {   
      myData += (char)packetBuffer[i];
    }
   lcd.setCursor(0, 0);
   lcd.print (myData);
   time1 = millis();
   lcd.setCursor(0, 1);
   lcd.print ("                ");
  }
}
Клиент
Код:
#include <ESP8266WiFi.h>
#include <WiFiUdp.h>
#include <OneWire.h>            // Подключаем библиотеку Wire
#include <DallasTemperature.h>  // Подключаем библиотеку DallasTemperature
WiFiUDP DS18B20Client;
#define ONE_WIRE_BUS 2                                  // Указываем, к какому выводу подключена датчик
OneWire oneWire(ONE_WIRE_BUS);
DallasTemperature DS18B20(&oneWire);
byte tries = 11;
String message;
void setup() { ;
  Serial.begin(115200);
  delay(10);
  DS18B20.begin();                                      // Инициализация DS18B20
  WiFi.disconnect(); 
  WiFi.mode(WIFI_STA);
  WiFi.begin("UDP_ESP8266","123456789");
  while (--tries && WiFi.status() != WL_CONNECTED)
  {
    Serial.print(".");
    delay(1000);
  }
  if (WiFi.status() != WL_CONNECTED)  {ESP.restart();}
    Serial.println("");
    Serial.println("WiFi connected"); 
  delay(10);                                            // Пауза 10 мкс
}

void loop() {
  message = "Temp = ";
  message += DS18B20.getTempCByIndex(0);
  message += " *C";
  const char *PacketToSend = message.c_str();
  DS18B20Client.beginPacket(IPAddress(192, 168, 4, 60),2807);
  DS18B20Client.write(PacketToSend);
  DS18B20Client.endPacket();
  delay(50);
    Serial.println("");
    Serial.println("DS18B20Client sleep");
  ESP.deepSleep(300e6); //5 min
  //delay(1000);
}
Но еще не тестировал в "полевых" условиях.
Нужно зарядить батарею.
Может кто нибудь то же попробует у себя? Или это тупиковый путь?
PS:Попробовал в тестовом режиме (от сети) - работает очень не стабильно.
Почему то часто просто не может подключиться к точке доступа (ESP-LCD)
Может быть ошибки в коде?
 
Последнее редактирование:

=AK=

New member
PS:Попробовал в тестовом режиме (от сети) - работает очень не стабильно.
Почему то часто просто не может подключиться к точке доступа (ESP-LCD)
Может быть ошибки в коде?
Что-то не вижу где у вас в основном цикле исполняется UDPTestServer.handleClient();
 

alexlaw

Member
WiFiAccessPoint:

Код:
void loop() {
    server.handleClient();
}
Но это вроде, когда клиент подключается к серверу, а у нас данные передаются по UDP.
Проосто нужно, чтобы оба находились в одной сети, так?
Попробовал прошить сначала Blanck-пустой прошивкой и пакет передаю несколько раз подряд, вроде заработало.
Но теперь что-то датчик температуры затупил, передает все время 85 градусов.
PS: начал грешить на датчик температуры (дает какой то сигнал на GPIO2 и не дает ESP нормально стартовать)- будет время проверю.
 
Последнее редактирование:

alexlaw

Member
Вернул первоначальный вариант
(Датчик и 1-й ESP - TCP сервер.
Индикаторы и 2-й ESP - клиент.)
Все работает без проблем, датчик рабочий.
Значит проблема в чем-то другом. В чем?
Еще вывод:
Питание ESP от голой батареи - утопия.
В закромах есть солнечная батарея.
Днем будет заряжаться аккумулятор, а ночью он будет работать.
И еще пробовать вариант
 

alexlaw

Member
Продолжаю тестировать автономное питание.
Остановился на варианте - аккумулятор + солнечная батарея.
Почитал форумы и сам понял, что нестабильное подключение к точке доступа у меня было следствием того, что один из ESP находился на макетной плате (плохой контакт, нестабильное питание).
Переделал. Питание через AMS1117-3.3. Датчик вывел на улицу. Аккумулятор дома. Еще на TP4056 подвесил вольтметр (правда он завышает показания, 4.14В на мультиметре).
IMG_20180226_115526.jpg
Не совсем понял, как снять показания питания возможностями самого ESP.
Пробовал так
Код:
ADC_MODE (ADC_VCC);
const int analogInPin = A0;
int Value = 0;
void handle_Analog() {
  Value = analogRead(analogInPin);
// ESP.getVcc ();
  String message = "analogValue = ";
  message += Value;   
  HTTP.send(200, "text/plain", message);
}
Получаю -1024.
В общем-то все работает стабильно, я думаю будет работать долго, не смотря даже на дополнительные расходы на вольтметр и светодиод на модуле AMS1117-3.3. Потому что батарея подзаряжается.
 

alexlaw

Member
До кучи добавил часы.

За основу взял проект - Making a simple ESP8266-based clock synchronized to NIST server - Embedded Lab
Код:
/* Project: Internet connected 7-segment clock
* By: Raj Bhatt (July 31, 2016), http://embedded-lab.com/blog/making-a-simple-esp8266-internet-clock
* Display is MAX7219-driven 4-digit seven segment LED display https://www.tindie.com/products/rajbex/spi-4-digit-seven-segment-led-display/
* NTP code taken from http://www.instructables.com/id/Steampunk-ESP8622-Internet-connected-Clock-using-t/
* No serial print statements in the code, as Tx pin is used to drive LOAD pin of MAX7219.
*/

// include the library code:
#include <ESP8266WiFi.h>
#include <WiFiUdp.h>
#include <Ticker.h>

Ticker flipper;
// WiFi connection
const char ssid[] = "your wifi SSID";      // your wifi SSID
const char pass[] = "Your WiFi password";  //  Your WiFi password
int hours_Offset_From_GMT = 3;  // Change it according to your location
byte btNum[10]={126,48,109,121,51,91,95,112,127,123};
WiFiServer server(80);
WiFiClient client;
unsigned int localPort = 2390;      // local port to listen for UDP packets

IPAddress timeServer(129, 6, 15, 28); // time.nist.gov NTP server

const int NTP_PACKET_SIZE = 48; // NTP time stamp is in the first 48 bytes of the message

byte packetBuffer[ NTP_PACKET_SIZE]; //buffer to hold incoming and outgoing packets

//Unix time in seconds
unsigned long epoch = 0;
unsigned long LastNTP = 0;

// A UDP instance to let us send and receive packets over UDP
WiFiUDP udp;

int hour;
int minute;
int blink=0, PM=0;

int RequestedTime = 0;
int TimeCheckLoop = 0;
int slaveSelect=1;
int din=2;
int clk=3;
byte dot=0;
void setup () {
pinMode(slaveSelect, OUTPUT);
pinMode(din, OUTPUT);
pinMode(clk, OUTPUT);
sendCommand(12,1); //normal mode (default is shutdown mode)
sendCommand (15,0); //Display test off
sendCommand (10,6); //set medium intensity (range is 0-15)
sendCommand (11, 7); //7219 digit scan limit command
sendCommand (9, 0); //decode command, use standard 7-segment digits
sendCommand (5, 79);
sendCommand (6, 91);
sendCommand (7, 103);
sendCommand (8, 1);
sendCommand (1, 127);
sendCommand (2, 109);
sendCommand (3, 95);
sendCommand (4, 95);
ConnectToAP();
udp.begin(localPort);
Request_Time();
delay(2000);
while (!Check_Time())
{
   delay(2000);
   TimeCheckLoop++;
   if (TimeCheckLoop > 5)
   {
     Request_Time();
   }
}
sendCommand (5, 0);
sendCommand (6, 0);
sendCommand (7, 0);
sendCommand (8, 0);
sendCommand (1, 0);
sendCommand (2, 0);
sendCommand (3, 0);
sendCommand (4, 0);
// flip the pin every 0.3s
flipper.attach(1, flip);
}


void ConnectToAP()
{
  WiFi.begin(ssid, pass);
  while (WiFi.status() != WL_CONNECTED) {
   delay(300);
  }
}

void loop() {

int SecondsSinceLastNTP = (millis() - LastNTP) / 1000;
//Update NTP every 2 minutes
if (SecondsSinceLastNTP > 120 and RequestedTime == 0) {
   Request_Time();
   RequestedTime = 1;
}

if (RequestedTime == 1)
{
   Check_Time();
   TimeCheckLoop++;
   if (TimeCheckLoop > 5)
   {
     RequestedTime = 0;
   }
}
DecodeEpoch(epoch + SecondsSinceLastNTP);
delay(500);
}

void DecodeEpoch(unsigned long currentTime)
{
//Update for local zone
currentTime = currentTime + (hours_Offset_From_GMT * 60 * 60);
hour = (currentTime  % 86400L) / 3600;
/*if(hour >= 12) {
   hour = hour-12;
   PM=1;
}
else {
   PM=0;
}
if(hour == 0) hour = 12;*/
minute = (currentTime % 3600) / 60;
sendCommand (8, btNum[hour/10]);
sendCommand (1, btNum[hour%10]);
//sendCommand (2, 1);
sendCommand (3, btNum[minute/10]);
sendCommand (4, btNum[minute%10]);
}

void Request_Time()
{
sendNTPpacket(timeServer); // send an NTP packet to a time server
}

bool Check_Time()
{
int cb = udp.parsePacket();
if (!cb) {
   
    return false;
}
else {
   // We've received a packet, read the data from it
   udp.read(packetBuffer, NTP_PACKET_SIZE); // read the packet into the buffer

   //the timestamp starts at byte 40 of the received packet and is four bytes,
   // or two words, long. First, extract the two words:

   unsigned long highWord = word(packetBuffer[40], packetBuffer[41]);
   unsigned long lowWord = word(packetBuffer[42], packetBuffer[43]);
   // combine the four bytes (two words) into a long integer
   // this is NTP time (seconds since Jan 1 1900):
   unsigned long secsSince1900 = highWord << 16 | lowWord;
  
   // now convert NTP time into everyday time:
   // Unix time starts on Jan 1 1970. In seconds, that's 2208988800:
   const unsigned long seventyYears = 2208988800UL;
   // subtract seventy years:
   epoch = secsSince1900 - seventyYears;
   LastNTP = millis();
   RequestedTime = 0;
   TimeCheckLoop = 0;
   return true;
}
}

// send an NTP request to the time server at the given address
unsigned long sendNTPpacket(IPAddress & address)
{
// set all bytes in the buffer to 0
memset(packetBuffer, 0, NTP_PACKET_SIZE);
// Initialize values needed to form NTP request
// (see URL above for details on the packets)
packetBuffer[0] = 0b11100011;   // LI, Version, Mode
packetBuffer[1] = 0;     // Stratum, or type of clock
packetBuffer[2] = 6;     // Polling Interval
packetBuffer[3] = 0xEC;  // Peer Clock Precision
// 8 bytes of zero for Root Delay & Root Dispersion
packetBuffer[12]  = 49;
packetBuffer[13]  = 0x4E;
packetBuffer[14]  = 49;
packetBuffer[15]  = 52;

// all NTP fields have been given values, now
// you can send a packet requesting a timestamp:
udp.beginPacket(address, 123); //NTP requests are to port 123
udp.write(packetBuffer, NTP_PACKET_SIZE);
udp.endPacket();
}
void sendCommand(byte cmd, byte data)
{
digitalWrite(slaveSelect, LOW); //chip select is active low
// передать старший байт
shiftOut(din, clk, MSBFIRST, cmd);
// передать младший байт
shiftOut(din, clk, MSBFIRST, data);
digitalWrite(slaveSelect,HIGH);
}
void flip()
{
sendCommand (2, dot);
dot++;
if (dot==2){dot=0;}
}
Дисплей на max7219 - самодельный.
Правда ESP еще одно - третье (благо было в запасе).
Но я думаю объеденить два скетча (часы и клиент) возможно и не сложно.
PS: батарея с подзарядкой работает отлично.
 

Вложения

alexlaw

Member
Продолжаю экспериментировать с ESP-01.
Бывает для отладки нужно видеть, что выводится в "Serial".
Так вот сделал соединение ESP с Arduino nano по UART, подцепил
waveshare 096 oled
oled.jpg

128x64.
И теперь, если в скетче ESP вывести сообщение - Serial.println("message"), то оно будет выведено на OLED display.
Соединяем
  1. -------------------------uno---или---nano -------------------------------------------------ESP
  2. #define OLED_RST -9-------------- 9
  3. #define OLED_DC---7 --------------7
  4. #define OLED_CS ---10-------------10
  5. #define SPI_MOSI--- 11------------- 11 /* connect to the DIN pin of OLED */
  6. #define SPI_SCK------13-------------13 /* connect to the CLK pin of OLED */
  7. -------------------------- TX ------------TX --------------------------------------------------RX
  8. -------------------------- RX-------------RX--------------------------------------------------TX
  9. --------------------------GND -----------GND --------------------------------------------- GND
Код:
#include <SPI.h>
#include <Wire.h>
#include <Adafruit_GFX.h>
#include <Adafruit_SSD1306.h>
String line;
const PROGMEM unsigned char bQ [] =
{
0x00,0x00,0x00,0x00,0x00,0x0c,0x03,0x6f,0xff,0xff,0xff,0xfb,0x80,0x00,0x00,0x00
,0x00,0x00,0x00,0x00,0x00,0x10,0x01,0xbf,0xff,0xff,0xff,0x56,0x00,0x00,0x00,0x00
,0x00,0x40,0x00,0x00,0x01,0x80,0x02,0xef,0xff,0xff,0xfd,0xb1,0x00,0x00,0x00,0x00
,0x00,0x80,0x00,0x00,0x01,0x40,0x01,0x3f,0xff,0xff,0xc0,0x2f,0x00,0x00,0x08,0x00
,0x00,0x00,0x00,0x00,0x00,0x03,0x10,0xdf,0xff,0xff,0xa1,0xdf,0xc0,0x00,0x00,0x00
,0x00,0x10,0x00,0x00,0x00,0x07,0x57,0x7f,0xff,0xff,0x7b,0x7f,0xa0,0x00,0x00,0x00
,0x00,0x40,0x00,0x00,0x10,0x8b,0x87,0xaf,0xff,0xfe,0xc0,0x2f,0xc0,0x00,0x00,0x00
,0x00,0x80,0x00,0x00,0x13,0x67,0xdf,0xfb,0xff,0xfd,0x40,0x0b,0x40,0x00,0x00,0x00
,0x00,0x00,0x00,0x00,0x31,0xe3,0xff,0xff,0xff,0xfb,0xa4,0x42,0xc0,0x00,0x10,0x00
,0x00,0x00,0x00,0x00,0x2b,0xfd,0xbf,0xff,0xff,0xf6,0xe5,0x60,0x80,0x00,0x00,0x00
,0x00,0x40,0x00,0x08,0x3b,0xfb,0x6f,0xff,0xff,0xff,0xea,0xe0,0x00,0x00,0x00,0x00
,0x00,0x00,0x00,0x00,0x3d,0xff,0xff,0xff,0xff,0xff,0xf4,0xf0,0x10,0x00,0x08,0x00
,0x00,0x00,0x00,0x10,0x3b,0xff,0xff,0xff,0xff,0xff,0xff,0xf0,0x40,0x00,0x00,0x00
,0x01,0x00,0x00,0x00,0x7f,0xff,0xff,0xff,0xff,0xff,0xff,0xe1,0xe0,0x00,0x00,0x00
,0x00,0x00,0x00,0x20,0x3f,0xff,0xff,0xff,0xff,0xff,0xfb,0x07,0x40,0x00,0x00,0x00
,0x00,0x00,0x00,0x00,0x3f,0xff,0xff,0xff,0xff,0xff,0xfe,0xfe,0xe0,0x00,0x00,0x00
,0x00,0x20,0x00,0x00,0x7f,0xff,0xff,0xff,0xff,0xff,0xff,0xdd,0xc0,0x00,0x00,0x00
,0x00,0x00,0x00,0x00,0x3f,0xff,0xff,0xff,0xff,0xff,0xff,0xff,0xf0,0x00,0x00,0x00
,0x00,0x00,0x00,0x20,0x3f,0xff,0xff,0xff,0xff,0xff,0xff,0xff,0xa0,0x00,0x00,0x00
,0x00,0x00,0x00,0x40,0x5f,0xff,0xff,0xff,0xff,0xff,0xff,0xff,0xf0,0x00,0x00,0x00
,0x01,0x00,0x00,0x00,0x3f,0xff,0xff,0xff,0xff,0xff,0xff,0xff,0xf0,0x00,0x00,0x00
,0x00,0x00,0x00,0x01,0x3f,0xff,0xff,0xff,0xff,0xff,0xff,0xff,0xf0,0x00,0x00,0x00
,0x00,0x00,0x00,0x00,0x2f,0xff,0xff,0xff,0xff,0xff,0xff,0xff,0xf0,0x02,0x00,0x00
,0x00,0x00,0x00,0x80,0x3f,0xff,0xff,0xff,0xff,0xff,0xff,0xff,0xf0,0x00,0x00,0x00
,0x00,0x00,0x00,0x00,0x2f,0xff,0xff,0xff,0xff,0xff,0xff,0xff,0xe0,0x00,0x00,0x00
,0x00,0x00,0x00,0x00,0x1f,0xff,0xff,0xff,0xff,0xff,0xff,0xff,0xe0,0x08,0x00,0x00
,0x00,0x40,0x00,0x80,0x1f,0xff,0xff,0xff,0xff,0xff,0xff,0xff,0xc0,0x00,0x00,0x00
,0x00,0x00,0x00,0x00,0x17,0xff,0xff,0xff,0xff,0xff,0xff,0xff,0xe0,0x00,0x00,0x00
,0x00,0x00,0x00,0x00,0x1f,0xff,0xff,0xff,0xff,0xff,0xff,0xff,0x80,0x00,0x00,0x00
,0x00,0x00,0x00,0x00,0x0f,0xff,0xff,0xff,0xff,0xff,0xff,0xff,0xc0,0x00,0x00,0x00
,0x00,0x00,0x00,0x00,0x0b,0xff,0xff,0xff,0xff,0xff,0xff,0xff,0x80,0x20,0x00,0x00
,0x00,0x00,0x00,0x00,0x0f,0xff,0xff,0xff,0xff,0xff,0xff,0xff,0x40,0x00,0x00,0x00
,0x00,0x00,0x10,0x00,0x07,0xff,0xff,0xff,0xff,0xff,0xff,0xff,0xc0,0x04,0x00,0x00
,0x00,0x00,0x00,0x80,0x07,0xff,0xff,0xff,0xff,0xff,0xff,0xfe,0x40,0x08,0x00,0x00
,0x00,0x00,0x00,0x00,0x05,0xff,0xff,0xff,0xff,0xff,0xff,0xfc,0x00,0x10,0x00,0x00
,0x00,0x00,0x00,0x00,0x07,0xff,0xff,0xfe,0xff,0xbf,0xff,0xfe,0x00,0x00,0x00,0x00
,0x00,0x00,0x00,0x00,0x0a,0xff,0xff,0xff,0xde,0xff,0xff,0xf8,0x00,0x00,0x00,0x00
,0x00,0x00,0x00,0x00,0x05,0xff,0xff,0xff,0xfb,0xff,0xff,0xfc,0x00,0x10,0x00,0x00
,0x00,0x00,0x00,0x00,0x06,0xff,0xff,0xff,0xff,0xff,0xff,0xf0,0x00,0x00,0x00,0x00
,0x00,0x00,0x00,0x00,0x03,0xff,0xff,0xff,0xff,0xff,0xff,0xf8,0x00,0x00,0x00,0x00
,0x00,0x00,0x00,0x00,0x05,0xbf,0xff,0xff,0xff,0xff,0xff,0xe0,0x00,0x08,0x00,0x00
,0x00,0x00,0x00,0x00,0x02,0xff,0xff,0xff,0xff,0xff,0xff,0xf0,0x00,0x10,0x00,0x00
,0x00,0x00,0x00,0x00,0x03,0x7f,0xff,0xff,0xff,0xff,0xff,0xc0,0x00,0x00,0x00,0x00
,0x00,0x00,0x00,0x00,0x01,0xff,0xff,0xff,0xff,0xff,0xff,0xa0,0x00,0x00,0x00,0x00
,0x00,0x00,0x00,0x00,0x01,0x7f,0xff,0xb6,0xdb,0xff,0xff,0xc0,0x00,0x20,0x00,0x00
,0x00,0x00,0x00,0x00,0x00,0xbf,0xfd,0x55,0x10,0xef,0xff,0x40,0x00,0x00,0x00,0x00
,0x00,0x00,0x00,0x00,0x00,0x7f,0xff,0x7a,0xa8,0x1b,0xfd,0x80,0x00,0x00,0x00,0x00
,0x00,0x00,0x00,0x00,0x00,0x5f,0xff,0xef,0xf6,0x0d,0xfb,0x00,0x00,0x40,0x00,0x00
};//
// If using software SPI (the default case):
#define OLED_MOSI   11
#define OLED_CLK    13
#define OLED_DC     7
#define OLED_CS    10
#define OLED_RESET  9
Adafruit_SSD1306 display(OLED_MOSI, OLED_CLK, OLED_DC, OLED_RESET, OLED_CS);
void setup() {
  line = "";
  Serial.begin(115200);
  delay(10);
  //Serial.println("");
// Serial.println("Serial begin");
display.begin(SSD1306_SWITCHCAPVCC);
//display.setRotation(2);
display.display();
delay(2000);
// Clear the buffer.
display.clearDisplay();
display.setTextSize(3);
display.setTextColor(WHITE);
display.setCursor(10,16);
display.clearDisplay();
display.println("Hello world");
display.display();
  delay(2000);
   display.clearDisplay();
display.drawBitmap(0, 16,  bQ, 128, 48, 1);
   display.display();
  delay(2000);

}

void loop() {
    while (Serial.available()){
      line = Serial.readStringUntil('\n');
display.clearDisplay();
display.setTextSize(2);
display.setTextColor(WHITE);
display.setCursor(1,16);
display.clearDisplay();
display.println(line);
display.display();
    }
  delay(10);
 
}
IMG_20180302_221935.jpg
PS: напряжения питания
ADC_MODE (ADC_VCC);
float voltag;
int v;

void handle_Analog() {
v=ESP.getVcc ()/10;
voltag=v/100;
String message = "Power = ";
message += voltag;
message += " B";
HTTP.send(200, "text/plain", message);
}
 
Последнее редактирование:

alexlaw

Member
Не обессудьте. если что.
Пишу здесь в основном для себя, чтобы через какое-то время, когда что-то забуду. не искать снова по просторам интернета.
 
Сверху Снизу